
HOW TO READ A SCHUMACHER BATTERY CHARGER GAUGE
Batteries play a crucial role in our daily lives. We have all experienced feelings of intense frustration because a drained battery has prevented us from getting on with our day.
In fact, it is when our batteries run dry that we actually realize just how important portable batteries have become to our very modern lives.
So, if you are serious about maintaining a healthy and reliable battery for uninterrupted rides, here is a quick guide on how to read a Schumacher battery charger gauge.
Table of Contents
How to Read a Schumacher Battery Charger Gauge: The Controls
The Schumacher battery charger is equipped with two switches that allow the operator to select the type of battery and the ampere charge rate to the battery.
Switch 1: To select the type of battery i.e. conventional battery, maintenance-free battery or deep cycle battery. If you are not sure about the type of battery you want to charge, then it is recommended to select the conventional mode.
Switch 2: Allows selecting the ampere charge rate or the current drawn by the battery, depending upon the battery’s type and size.
Note: While you are preparing to charge, check the vehicle’s owner manual to make sure your battery has a 12-Volt rating. Never connect the charger to a 6-Volt battery, as this could damage the battery.
Typically, a charger has three different current or Ampere selection options. A lower-rating will read 2 Amp, a medium-rating between 10-12 Amps, whereas the highest rating will read 50-75 Amps (for engine start/cranking).
It is recommended that you select the lower value for smaller batteries, the medium for larger batteries, or for faster charging and engine cranking the highest setting.
| Charge Rate (Amps) | Charge Time (Hours) | Recommended Uses |
|---|---|---|
| 2 Amp 12-Volt Batteries | 3-8 | Motorcycles, Lawn-mowers, Snow-mobiles, RV’s or Autos |
| 10 Amp 12-Volt Batteries | 3-5 | Recreational vehicles, Trolling motors, and Automobiles, Vans, Trucks. |
| Engine Start | 10 Seconds ON 180 Seconds OFF | Cranking assist - helps to start the engine when the battery power is low. |
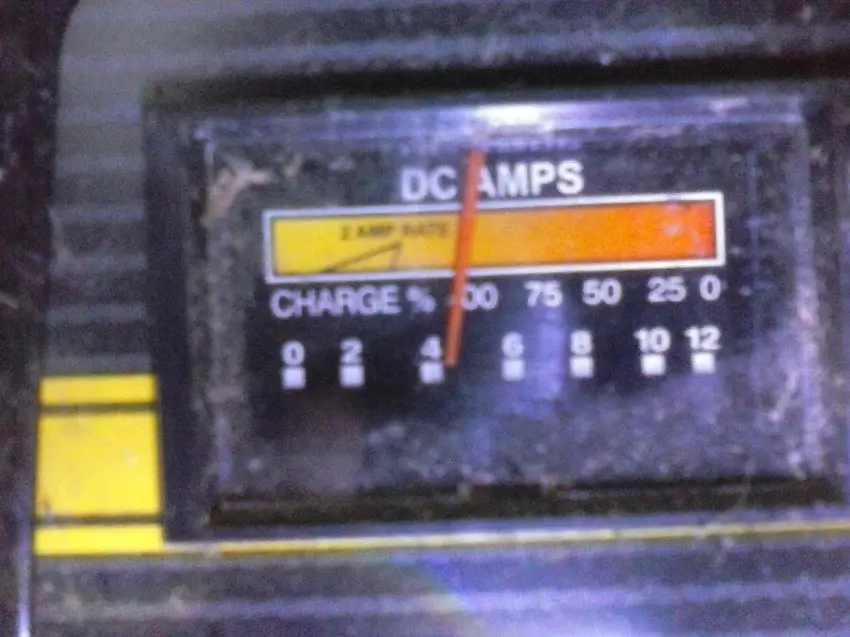
READING THE METER
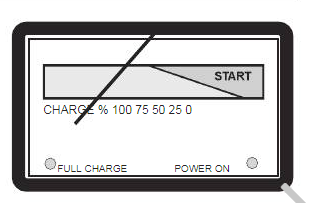
A fully Discharged Battery
Initially, when the charger is connected to the battery, the gauge will point towards the 25% mark. This signals that the battery is fully discharged. Typically, the current drawn by the battery at this moment will be 10 Amps. Slowly, the charger coordinates with the charging condition of the battery, and applies the maximum current.
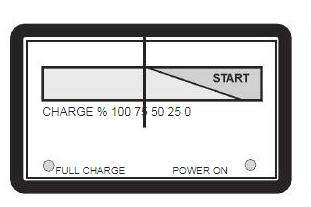
Approaching full charge
Gradually, the battery becomes charged. The needle moves towards the full-charge mark on the left side of the gauge, where an LED indicator (Full charge) is located. Typically, the current drawn by the battery at this point decreases to 5 Amps; the battery is almost charged and there’s no further requirement of high current.
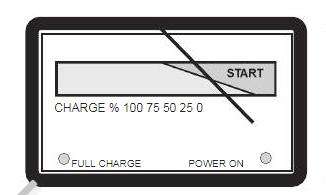
A Fully Charged Battery
Finally, when the battery is fully charged, the current supply drops to zero Amps. The green LED indicator labeled as ‘Full-charge’ illuminates and the needle points towards the 100% mark.
Steps for charging an installed battery
- Positive and Negative cables of charger shall be laid properly, away from moving parts of the vehicle.
- Stay clear of moving parts of the vehicle like engine, fan, belts and pulleys, etc.
- Check the terminals of the battery for polarity. Generally, the positive terminal is a little larger than the negative terminal.
- Check which terminal of the battery is grounded, i.e. attached to chassis of the vehicle.
- For a vehicle with negative grounding, connect the positive red clip from the battery charger to the positive terminal of the battery. Connect the negative black clip from the charger to some solid part of the chassis of the vehicle. This can be the heavy metal of the engine frame.
- For a vehicle with positive grounding, connect the negative black clip of the charger to the negative terminal of the battery. The positive red clip of charger should be connected to the heavy frame of the vehicle.
- When the battery is charged, remove the clip from chassis of the vehicle and finally remove the clip from the battery terminal.
Note: Never connect the charger clip intended for the chassis to the carburetor or fuel lines.
Steps for charging an uninstalled battery
- Determine the positive and negative terminals of the battery.
- Attach an insulated battery cable to the negative terminal.
- Attach red clip from charger to the positive terminal.
- Now attach the black terminal to the free end of the cable attached to the negative terminal.
- Follow the reverse pattern of the above procedure to remove the connections after charging is complete.
How to read a Schumacher Battery Charger Gauge – GENERAL PRECAUTIONS AND SAFETY
- Set Switch 2 to the ‘2 Amp’ position before connecting or disconnecting the clips.
- Make sure that the clips do not touch each other to avoid any spark or damage. While attaching the clips to the battery, twist the clip over the battery terminal at least 2-3 times to ensure firm grip connection.
- Make sure that the charger is never placed directly above the battery being charged, as any gases emanating from the battery may damage the charger. Also, ensure that the battery is also not set directly on top of the charger.
- Never allow battery acid to drop onto the charger while filling the battery.
- Never operate the charger in an area with restricted ventilation.
Like how to read a Schumacher battery charger gauge? Check out more of our battery reviews here.